Turning the Page List block into a Google Map in concrete5 - part 1
The most useful and flexible of all of concrete5's default block types is undoubtedly the Page List block. We don't actually have to output lists of pages though, in this post I'm going to explain how to use it to output a Google Map of locations.

The Page List block can be be used in a variety of ways to list pages of a particular type, from a part of the sitemap, dynamically based on the page, it can paginate, it can order, it slices, dices, and even can output results as an RSS feed.
The power of the block when it comes to customisations is in the fact that the block really only fetches pages and outputs them in a very simple way - the choice is yours as to how you actually want to output the information about the pages (and page attributes).
Just because it's the Page List block, doesn't mean you actually have to _list_ pages on the output!
Lately we've been working on a several sites that involve physical locations, such as properties of businesses that have an address associated with them. Naturally we've been creating custom page types, custom attributes and using the composer to manage such listings, this works great.
On these sites what we wanted to do was create a Google Map with the property locations on it, being able to click through on the map to the property's page.
With a single custom template for the Page List block we were able to achieve this. Read on if you'd like to see how it's done. There are a few parts to it, but once you've got these basics covered it's pretty easy to repeat where you need it.
I'm going to explain this on version 5.6 of concrete5 - the same concept should roughly work in 5.7, but we've simply not used 5.7 in this way yet. It's really only the placement of the block template folder which is different.
I'm going to assume that you are comfortable creating custom page types and attributes for this.
Create a custom page type
Let's create a custom page type called Property.
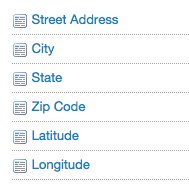 Create attributes to store an address. I prefer not using the built in attribute for this as it makes it harder to import records later on. Appropriate fields would be street_address, city, state, zip_code.
At this point also create two text fields to store a latitude and longitude, let's call them lat and long.
(We won't use these fields until part 2, but it's handy to create them now)
Set this page type up to use the Composer, including those fields. At this point it would be worthwhile adding a few records, with real addresses for testing purposes.
You can also at this point add a Page List block to your site. Just make sure you pick your new page type and don't limit the number of pages it outputs.
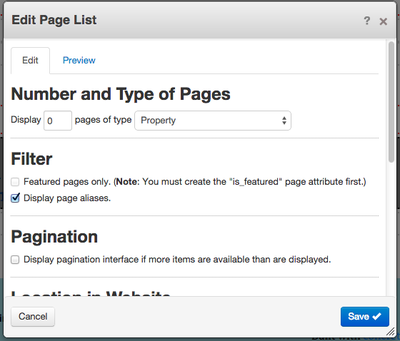
Obviously it will just exhibit the default behaviour of, well, listing the pages you ask it for.

Creating a custom template for the Page List block
In the top level /blocks folder create a folder called page_list. Inside that create a folder called templates and inside that create a folder called map_view. This means you should have the folder structure /blocks/page_list/templates/map_view
Copy into this new folder the view.php file from /concrete/blocks/page_list
We what we want to do with this template is to still loop through the pages it finds, but not directly output them. Instead, it should retrieve the address and lat/long details of properties and store them in an array. Lets get rid of the pagination and RSS code and really strip it back to something very bare.
It would look something like this.
<?php
defined('C5_EXECUTE') or die("Access Denied.");
$th = Loader::helper('text');
?>
<?php
foreach ($pages as $page):
    // Prepare data for each page being listed...
    $title = $th->entities($page->getCollectionName());
    $url = $nh->getLinkToCollection($page);
endforeach; ?>
This template doesn't do anything yet but loop through the pages the block finds, there's no output performed.
To assist with outputting maps, I'm going to use the jQuery library gmap3 - http://gmap3.net/
This is technically optional, but I find that it makes maps much easier to configure.
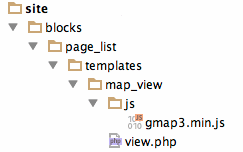 Within your map_view folder, create a folder called js. Download the library and copy the gmap3.min.js file into this.
Note that files placed with js and css folders within a block template will be automatically included on the page.
This jQuery library still uses the Google Maps script, so link in the maps script using the following at the bottom of your template script:
<script type="text/javascript" src="https://maps.google.com/maps/api/js?sensor=false&language=en"></script>Next, we'll add a DIV with an id we can target for the output of the map, and trigger the map off. We'll make the map div only output when the page is not in edit mode and we'll include the minimum code required to initialise gmap3:
<?php
defined('C5_EXECUTE') or die("Access Denied.");
$th = Loader::helper('text');
?>
<?php
foreach ($pages as $page):
// Prepare data for each page being listed...
$title = $th->entities($page->getCollectionName());
$url = $nh->getLinkToCollection($page);
endforeach; ?>
<?php
$currentPage = Page::getCurrentPage();
if (!$currentPage->isEditMode()) { ?>
<div id="map<?php echo $bID; ?>" style="min-height: 400px"></div>
<?php } else { ?>
<p><em>Map disabled in edit mode</em></p>
<?php } ?>
<script type="text/javascript" src="https://maps.google.com/maps/api/js?sensor=false&language=en"></script>
<script>
$(document).ready(function(){
$("#map<?php echo $bID; ?>").gmap3({
map:{}
},'autofit');
});
</script>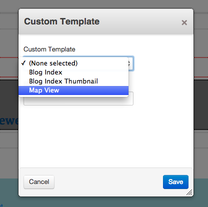 Now if you change the template of the Page List block you added to the 'Map View' template (right click on the block and pick 'Custom Template'), you should see an embedded Google Map.
It won't have any markers on it, but at least we know the library is working.
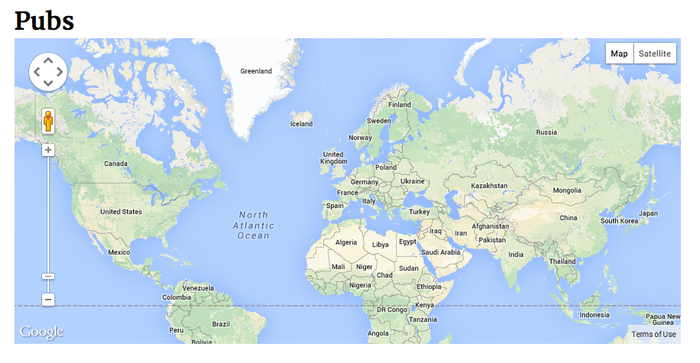
(no pubs in the entire world found?!)
What we need to do now is go back to the loop in our custom block template and set up an array of addresses.
Above the loop, initialise an array:
$addresses = array();Then within the loop add the following lines (don't worry, full script is further down):
$address = $page->getAttribute('street_address') . ' ' . $page->getAttribute('city') . ' ' . $page->getAttribute('state');
$position = 'address:'. json_encode($address);
$addresses[] = '{'.$position .', data:'.json_encode($url). '}';
These lines fetch the attribute values of the page, create an address string and encode into an appropriate json array for Javascript to read.
We can then start to expand our jQuery code to pass these address values to the map:
<script>
    $(document).ready(function(){
        $("#map<?php echo $bID; ?>").gmap3({
            map:{  },
            marker: {
                values: [<?php echo implode(',', $addresses); ?>]
            }
        },'autofit');
    });
</script>
When gmap3 is given a full address, it automatically asks Google for it's position. After a refresh you should see your demo locations on your map.
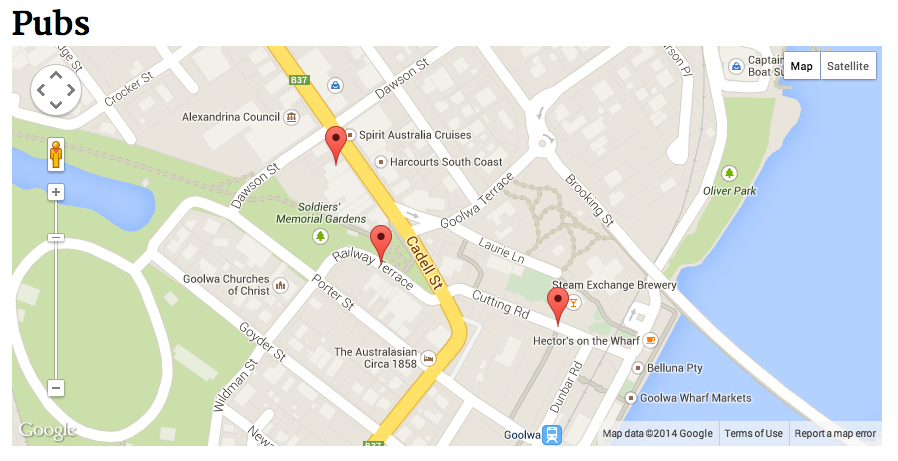
(phew!)
Finally, you may have noticed that in the loop through the addresses we've used the url of the page. This information is also passed to gmap3, so we can use this to navigate through to the page when we click on the marker. We can add a handler for clicks on the markers, here's the complete script up to this point:
<?php
defined('C5_EXECUTE') or die("Access Denied.");
$th = Loader::helper('text');
?>
<?php
$addresses = array();
foreach ($pages as $page):
// Prepare data for each page being listed...
$title = $th->entities($page->getCollectionName());
$url = $nh->getLinkToCollection($page);
$address = $page->getAttribute('street_address') . ' ' . $page->getAttribute('city') . ' ' . $page->getAttribute('state');
$position = 'address:'. json_encode($address);
$addresses[] = '{'.$position .', data:'.json_encode($url). '}';
endforeach; ?>
<?php
$currentPage = Page::getCurrentPage();
if (!$currentPage->isEditMode()) { ?>
<div id="map<?php echo $bID; ?>" style="min-height: 400px"></div>
<?php } else { ?>
<p><em>Map disabled in edit mode</em></p>
<?php } ?>
<script type="text/javascript" src="https://maps.google.com/maps/api/js?sensor=false&language=en"></script>
<script>
$(document).ready(function(){
$("#map<?php echo $bID; ?>").gmap3({
map:{ },
marker: {
values: [<?php echo implode(',', $addresses); ?>],
events:{
click: function(marker, event, context){
window.location = context.data;
}
}
}
},"autofit");
});
</script>Now if you add further property pages to your site, they'll automatically show up on this map. Since it's based on the Page List block, you can still use it's features such as selecting a particular part of your sitemap, effectively filtering your displayed maps.
Wait, we have an issue!
Although this example works fine, there is one critical issue with the way this is set up - we're only passing addresses to the gmap3 script, which means it has to on every load 'geocode' the address (i.e. request from Google it's latitude and longitude). With a few records there isn't much of a pause, but when there are many records this slows things down considerably and it can take several seconds for your markers to display.
In my example we (sadly) don't often have a new pub pop up in our town of Goolwa very often, so we might be tempted to leave it the way it is, but ultimately you're not really supposed to use Google Maps this way; the ability to look up addresses is a convenience, not what you should be doing with every page view.
In part two of this post we'll improve the script above to use latitude and longitude, as well as explore a way we can make the lookup of these values automatic in concrete5.
-Ryan